Have you ever wanted to take a noiseless landscape shot in low light but didn’t have a tripod with you? Got frustrated while trying to get a macro shot into perfect focus? Or have you ever tried to photograph some landmark but those pestering tourists kept getting into view? I bet all of these happened to you too. What do these problems have in common? They can all be fixed using the same basic technique, so today I’m going to show you how.
The technique works best with good DSLRs capable of high frame rates (I have a Sony A77 capable of 12fps) but you can achieve the same results with any camera, it just requires more patience. The concept goes like this: even though all images in a series may be flawed (underexposed, high noise, out of focus, unwanted content), when combining these images together the flaws can cancel out, What’s even better, the process can be automated!
As a sidenote, the process can be also replicated by shooting a video and extracting frames.
So let’s explore the common problems and solutions.
Scenario 1: Low-light photography without a tripod
You know the problem: you just have to make a landscape photo after sunset but don’t have a tripod. Or maybe you’re inside a dark Gothic cathedral and have just a few seconds to take a shot. You increase the ISO and discover it’d take ISO3200 for the shutter speed to be fast enough to avoid camera shake. Past ISO 1600, no matter what camera you have, noise is still a problem.
So, instead of taking just one shot at ISO3200, you take 5-8 shots, trying to keep the camera steady.
To illustrate this, I used the following simple test scene:
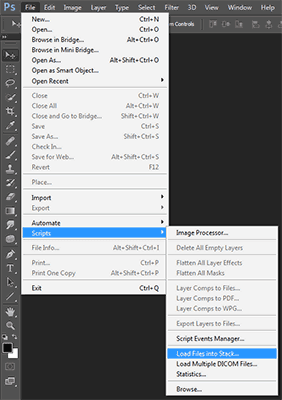
In Photoshop, from the File menu, choose Scripts –> Load Files into Stack…
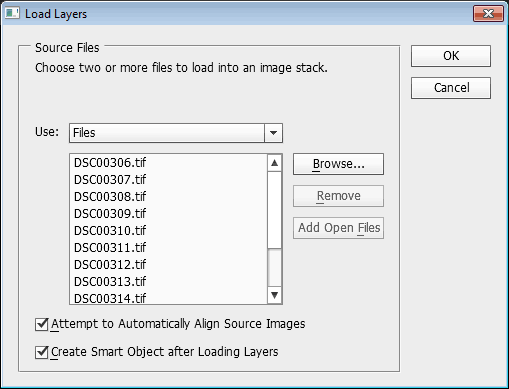
Click Browse… and select all your photos. Check the Attempt to Automatically Align Source Images and Create Smart Object after Loading Layers options.
Depending on the number of images and their resolution, the process might take quite some time and eat lots of memory.
After the images are loaded, you won’t see much – the Layers panel will show the first image in the sequence with the small Smart Object icon.
Now comes the magic ingredient: From the Layers menu choose Smart Object –> Stack Mode –> Mean.
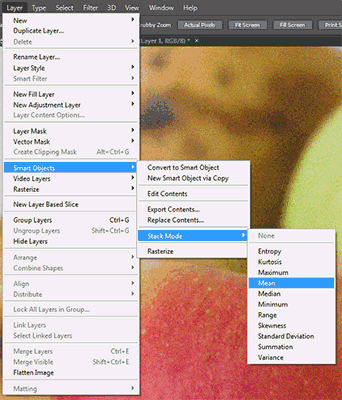
What it does is reads each pixel’s value from every frame and computes the average. Since noise is random, it will cancel out.
Here’s the Before-and-After, at 100% magnification:
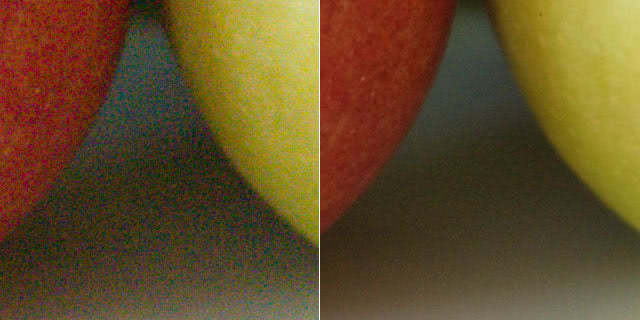
Pretty impressive, right? By the way, this is how “temporal smoothing” works in video.
Of course, this works for static subjects only.
Scenario 2: One long exposure from many short(er) exposures
The following technique is used mostly by astrophysicists to create hour-long exposures but it has a limitless range of creative approaches. You can use it as a substitute for the previous method, create star trails with it, ghosting and many many things. It’s basically the digital equivalent of the multiple exposure mode in the film era.
The principle is the same – Stack multiple images, but instead of averaging exposures, we’re adding them.
I’ll use the same test scene:
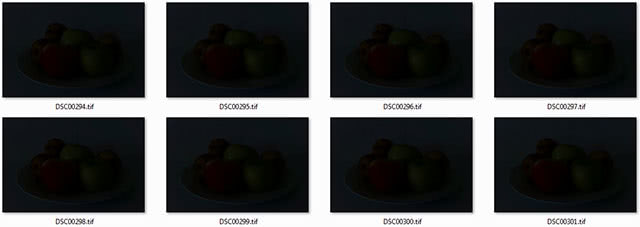
I shot the series underexposed by about 5 stops. The images are almost black.
Following the same steps (Load Files into Stack) you then select Summation from Layer –> Smart Object –> Stack Mode.
Here’s the result after stacking 6 images:

Oh, and by the way, don’t try to be “clever” and reuse the same underexposed image multiple times, as you’d just amplify the noise.
Scenario 3: Tourist removal
“Tourist removal” is definitely more descriptive than “elimination of transient unwanted elements”.
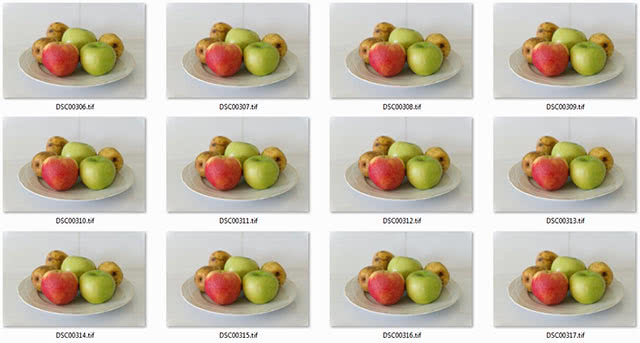
There are times when you want to photograph something but there are distracting elements moving around in the scene. The scene is never clear of these elements but they also never occupy the same space. Let me use another simple test scene to make my point:

As you can see, at no point is the plate empty. We could manually copy and paste bits from one photo to another, clone and blend but what if you can do it with just a few clicks? You again load individual files into a Stack, and then select Mediab from Layer –> Smart Object –> Stack Mode.

And look, almost all black pebbles are gone! One lone object remains – a reminder that you shouldn’t choose two photos with objects/people in the same position, otherwise the algorithm will “think” that they belog there.
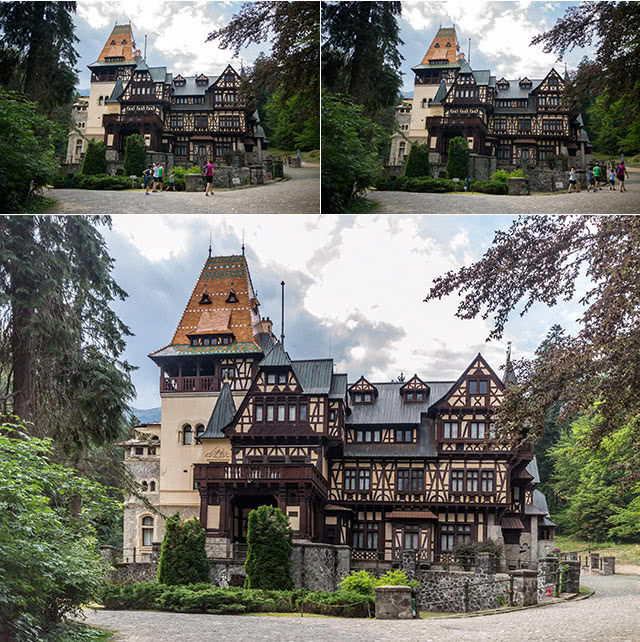
Here’s a real-world example:
Scenario 4: Perfect focus
The final scenario is about focusing, especially for close objects. When you shoot objects in the macro range, it becomes very difficult to keep everything you want in focus. Of course, you close down the lens to F/16 but maybe even that may be not enough. Some of you might think “close it down to F/22 or F/32, that should do it!” Sadly, as the aperture closes, diffraction issues kick in, reducing the sharpness. Most lenses peak in sharpness at about F/8 to F/16 and go downhill after that. Regardless, not even F/32 may always be enough.
So what do you do?
You shoot a sequence of photos from the same position, with the same exposure but focused differently – from front to back. Like this:
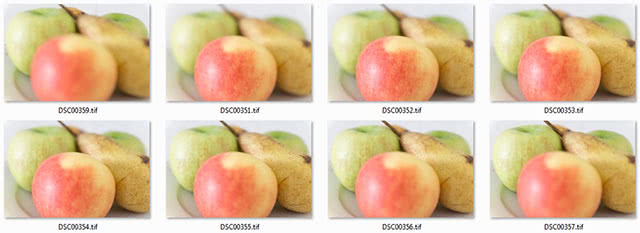
Again, you create an image stack with File – Scripts – Load Files into Stack but this time don’t select the Create Smart Object after Loading Layers option. After the images are have been loaded, go to Edit –> Auto Blend Layers… and from the dialog, make sure the Stack Images option is selected.
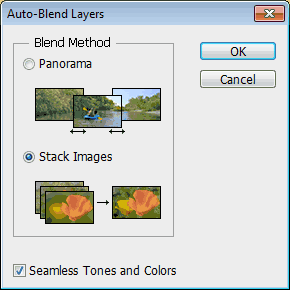
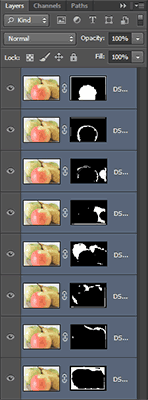
As you can see, Photoshop automatically selects the best (sharpest) parts from each image and combines them, creating editable masks in case you need any fine-tuning.
And let’s see the end result:
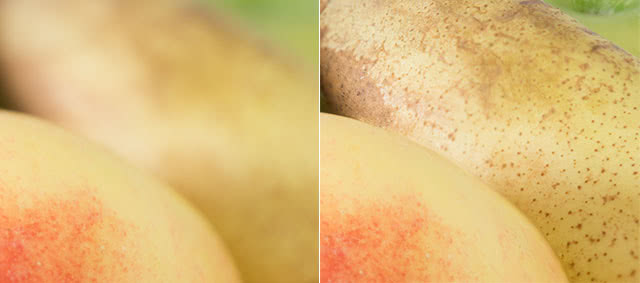
Perfect focus!


4 Responses
hello dear
i have a problem in Scenario 1
when i choose pictures in Stacking Dialog
i have have just Attempt to Automatically Align Source Images
i have not Create Smart Object after Loading Layers
so after loading pictures i cant use Stack mode!!
i have cs6 in windows
can u help me maybe?
I think that the Create Smart Object option is available in Photoshop Extended only. You CAN however manually create a Smart Object after aligning the layers.
The problem is that he doesn’t have the Extended version of Photoshop…
The “stack mode” only works in the Extended version
Comments are closed.