If you are a photographer and want to use the so-called Rule of Thirds in your compositions, here’s a neat trick to show it in Photoshop:
Setting it up
- Open Edit –> Preferences –> Guides, Grid and Slices
- Edit Gridline every… 100 percent
- Subdivisions… 3
- Click OK

That’s it!
Now to show or hide the grid, just press CTRL+’ or select View –> Show –> Grid
What is this Rule of Thirds anyway?
Just in case you never heard of this “rule”, let me give you some points:
Beginners in photography tend to frame everything dead in the center. Sometimes it works, sometimes it doesn’t. There are many rules that can be used to achieve a more pleasing composition and this is one of them.
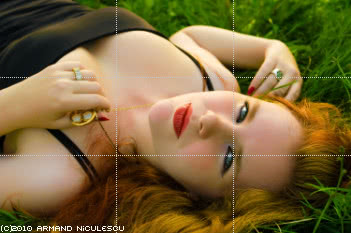
The Rule of Thirds states that you can achieve better composition balance if you place the interesting features of your photos along horizontal and/or vertical lines that divide your picture in thirds, or at the intersection points.
To illustrate my point, have a look at the pictures below:
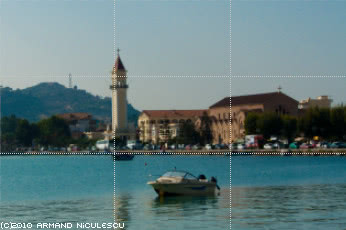
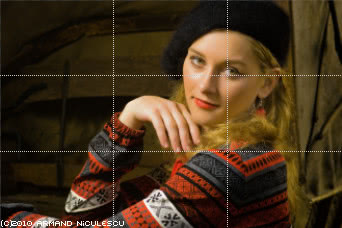
As with any photography “rule”, you shouldn’t get obsessed with it. Not everything has to be framed according to it. Understand it, learn it, try it – then break it!


2 Responses
Hi Armand,
Just thought I’d follow your tutorial up with a link to a free photoshop script that can overlay a number of variations of rule of thirds, golden ratio etc.
http://goldencrop.sourceforge.net/
Cheers
Rog
Hey Rog, thanks for the link, and Armand, nice, easy beginners tut thanks
Comments are closed.