There are many instances, especially in creative advertising, when you need to blend computer generated elements in a photo in a convincing manner. This tutorial will show you some techniques to achieve photorealistic results.
For this tutorial, I decided to recreate the unofficial image for Microsoft Courier. Just in case you don’t know what I’m talking about, in the early 2010 some concept images and videos of a very slick, dual-screen, foldable tablet were leaked on the internet. Whether that leak was intentional or not is another story. Everyone was pretty excited by the idea, but the concept was canned by Microsoft a few months later.
The 3D model
If you’re a photographer or Photoshop artist only, this part will be the hardest. 3D modeling tools are very complex and difficult to master.
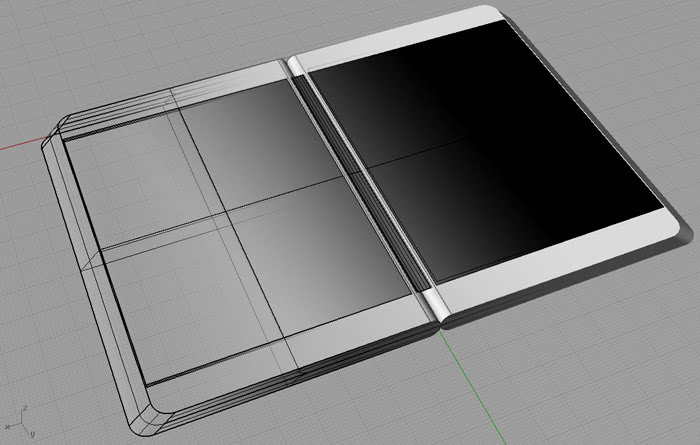
3D modeling is beyond the scope of this tutorial. Suffice to say that I built the model as a spline cage, turning them into NURBS patches. Then I exported the model in 3ds format.
Building the prop
Next, I built the prop based on the dimensions of the virtual device. Fortunately this was pretty easy as the device dimensions are exactly those of two DVD covers. I sacrificed two covers by joining and gluing them together and then wrapping them in aluminum foil.
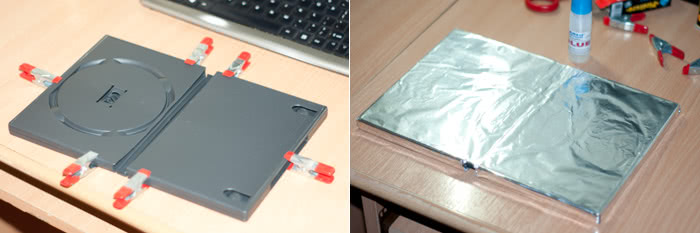
As you can see, it was a rush job. I was only interested in getting the size right and I used foil to catch some reflections.
The photo
With the prop built, I proceeded with the photo. I put a neutral background and used an umbrella with wireless flash to get an even lighting on the hands.
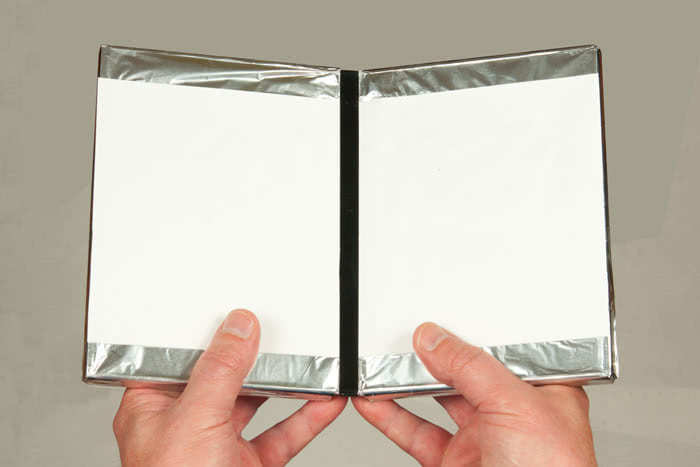
It’s definitely not pretty to look at. Still, considering that it was about to be replaced completely, it doesn’t matter how it looks. Do notice however that the aluminum foil is picking up some reflections form the hands.
Photoshop
Now here it’s where the fun begins.
Importing the model
From the 3D menu I chose New Layer from 3D File…
Photoshop CS5 Extended does a pretty good job at importing 3D models and their materials. It supports 3ds and obj formats, which are among the most popular. As a tip, I discovered that grouped objects are imported better by Photoshop; otherwise the relative positioning may be off.
Alignment
I placed the 3D layer over the photo and adjusted its opacity to see through it. Then by using the camera rotate tools (rotate, pan, walk and zoom) I aligned it with the hands. I made sure the virtual camera lens matches the real one’s focal length (taking the multiplier into account). On the whole, the process is not very precise, but it shouldn’t take more than five minutes to have it aligned properly.
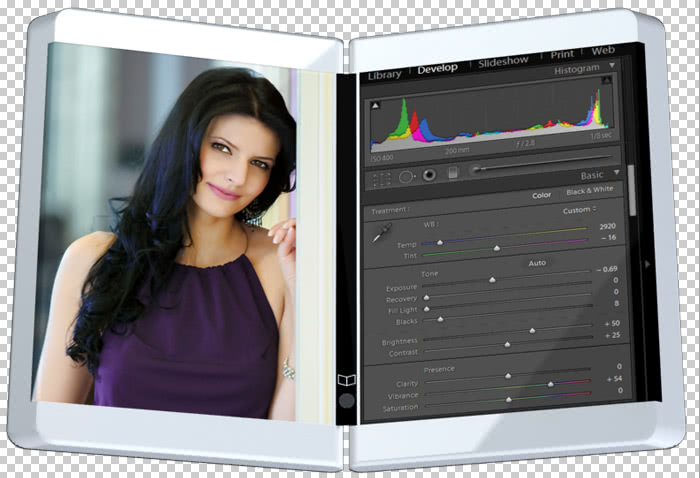
Setting the materials
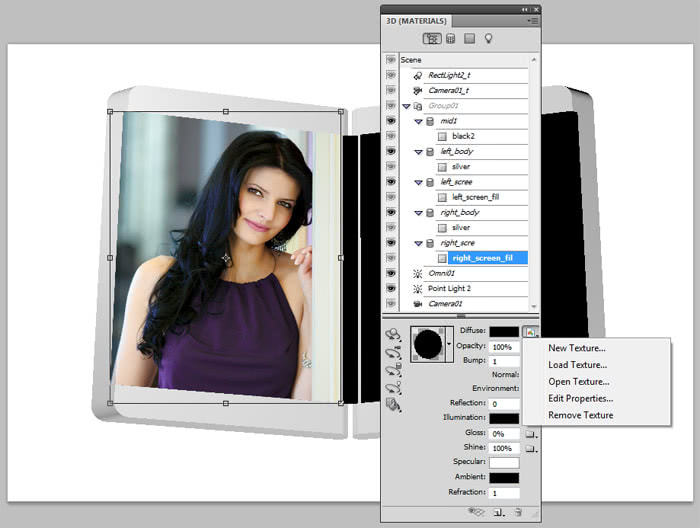
Then I checked the materials. Photoshop has a small collection of materials, so I applied a silver material with 50% reflectivity on the body (materials appear hierarchically as a sub-object of a mesh). On the panels I selected the material and I clicked the button next to the Diffuse color and selected Load Texture.
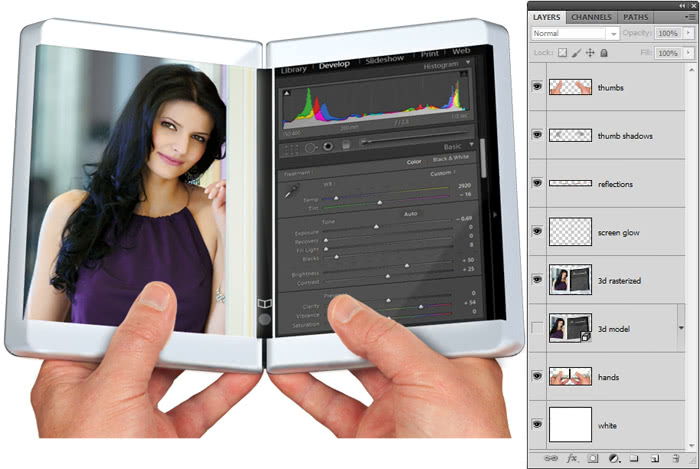
Isolating the hands and thumbs
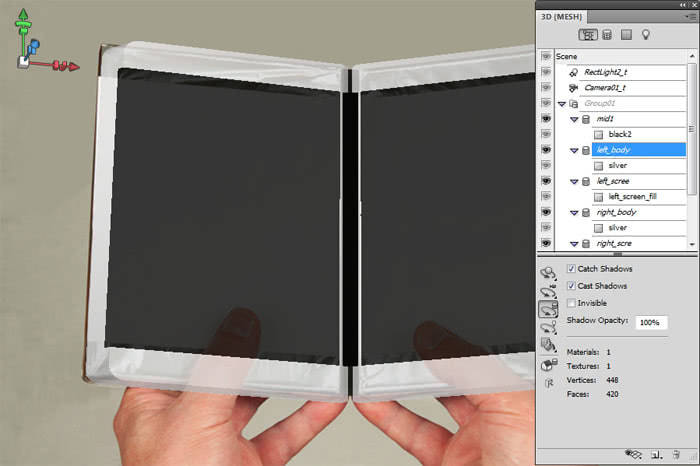
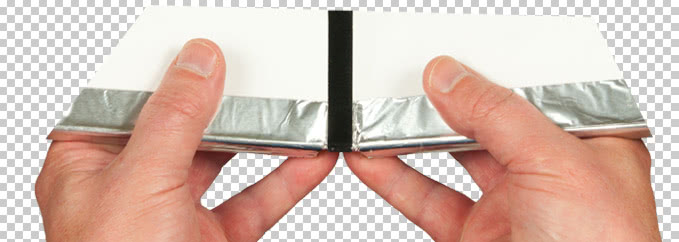
Next, in the original photo, I double-clicked on the lock in the Layers panel of the Background to make it a layer. I deleted most of the image, keeping just the hands area.
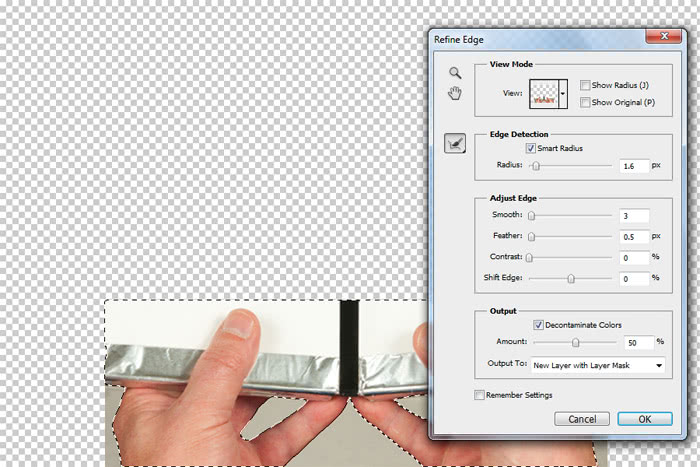
Using the Quick Mask tool, I selected the background areas around the hands (it really helps to have a neutral background) and I removed it.
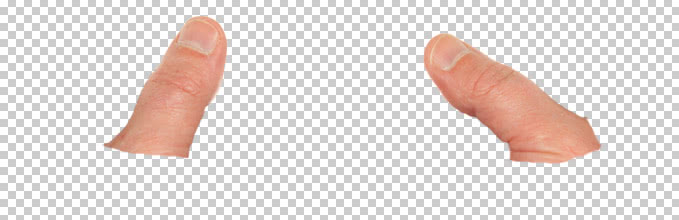
By pressing Ctrl+J I duplicated the layer and with the new layer I proceeded with another selection, removing everything except for the thumbs.
At this stage, this is how the image was looking:
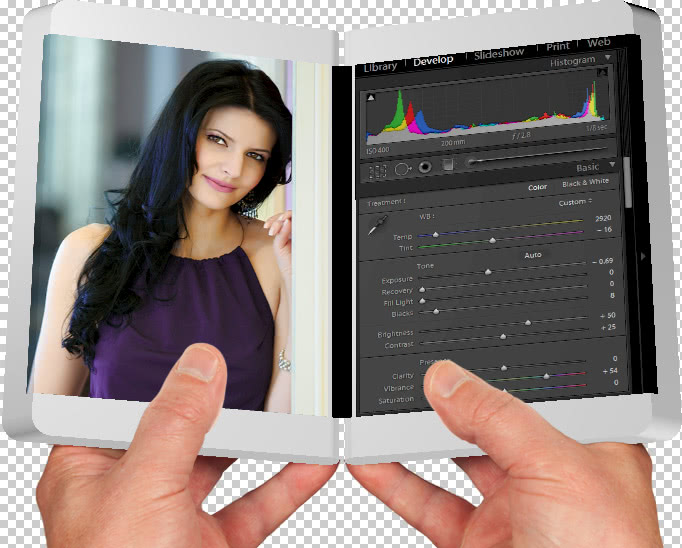
Note that the tablet is drawn using the Interactive Renderer.
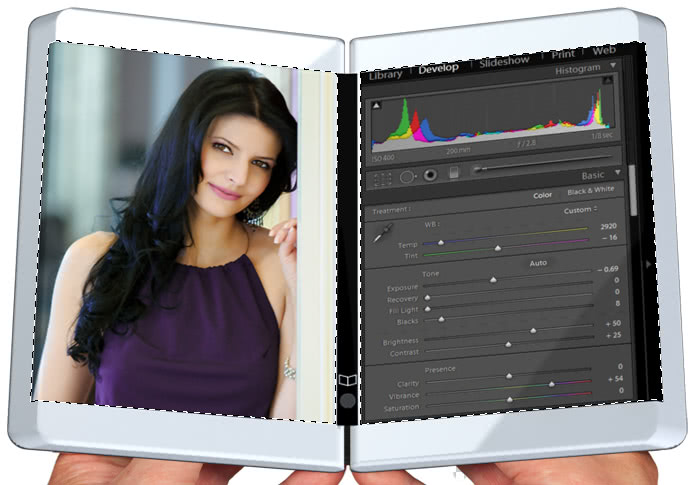
Retouching the 3D model
Next, to improve performance, I duplicated the layer and rendered it with the Ray Traced Final quality. After that, I rasterized the duplicated layer with Layer –> Rasterize –> 3D. Then I made some tweaks, including using the Blur tool to smooth the edges a little. As a side note, I could have done this in the 3D model by using a Smooth or Fillet Tool, but I wanted to illustrate that such edits are possible in Photoshop, especially if you have only low-poly models (such as those from Google Sketch-Up).
Shadows and reflections
With the model looking all nice and shiny, it was time for the final shadows and reflections.
From the original photo, I selected the bottom area that was featuring reflections of the hands. I applied a high-radius smooth feather and copied it to a new layer, where I used Gaussian Blur.

Lastly, I selected the thumbs and created some nice soft drop shadows for them (you can see there are some soft shadows in the original photo as well). The shadows had to be visible on the device body only and especially not on the screen, so I right-clicked on the layer effects and chose Create Layer. This “detached” the shadow in its own layer, allowing me to erase the unneeded areas.
Screen glow
If you ever tried to photograph a device with an LCD, you know it’s not easy balancing the ambient light with the image displayed on the LCD. Glare and white balance differences further complicate the matter, which is why in most cases the image is added in later in Photoshop (or in the case of video, using complex motion tracking software such as Imagineer Mocha).
To add just a touch of realism, I wanted the screen to glow a bit. For this, I made a selection of the two screens.
From the Channels panel I clicked on the Save Selection to Channel button, as I was going to need it again later. I then copied the screens to a new layer and applied a large Gaussian Blur.
I then reloaded the selection with Load Selection from Channel and deleted the inside of the blurred layer.
To better see how the glow looks, here it is on black:
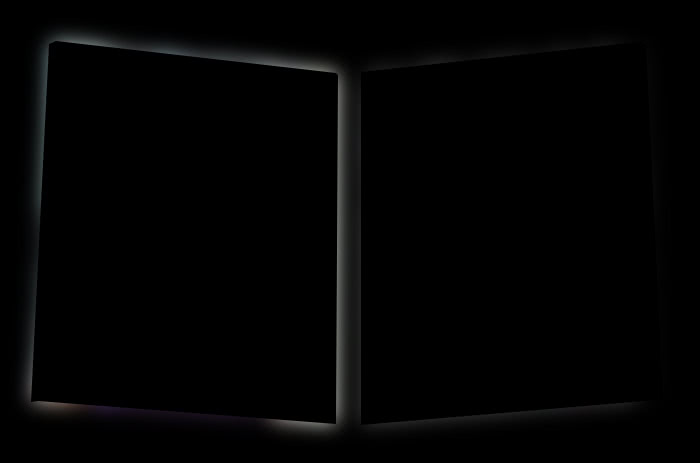
Finally, I set its blending mode to Linear Dodge (Add).
The Result
So there you have it. Using the 3D tools in Photoshop, you can integrate 3D content in a composition with ease, as long as you’re planning ahead and build some props. Making sure the prop material matches the real one helps improve the realism.